Rapid Prototyping and On-Demand Production for
Optical communications
Industry
Obtain high-quality manufacturing services for your custom optical communication components
Precision Optical Tube Assemblies for Optical Communications
Applications
Optical Tubes for Critical Applications

Astronomical Telescopes
Large-diameter optical tubes (Invar material) with strict concentricity (≤0.005mm) to ensure stable light path alignment.

Microscopes
Thin-walled aluminum tubes (6061) with matte black finish, preventing internal reflections for clear imaging.

Industrial Cameras
Precision-machined lens mounts (304 stainless steel) with 90° angle accuracy, ensuring focus stability.

Military Optics
Titanium alloy tubes with anti-oxidation treatment, resistant to extreme temperatures and corrosion in field environments.
Optical Machining Capabilities
Advanced Manufacturing for Optical Tubes
5-Axis CNC Machining
Handles complex geometries like thin-walled tubes (0.5mm) with minimal deformation. Ensures precise angles for lens mounts with ±0.01° tolerance.
Light-Blocking Threads
High-precision threading designed specifically for optical trapping. Strict dimensional control prevents rotation noise in telescopic systems.
Anti-Oxidation Process
Featuring pre-machining solution treatment for 2A12 aluminum and deep cryogenic treatment post-roughing to ensure stability in extreme environments.
Surface Finishing Options
Specialized matte black anodizing for aluminum and vacuum plating (black nickel) for Titanium/Invar. Designed to meet strict light-blocking requirements.
How do optical communication companies use the DakingsRapid network?
Optical Module Development and Testing
High-Speed Optical Communication Device Samples
Optical Communication Racks and Structures
systems
Prototype Manufacturing of Optical Communication Equipment
Optical Transmission System Components
Small-Batch Optical Communication Test Components
Optoelectronic Hybrid Integrated Components
Optical Communication Racks and Structures
We tailor our services to the specific needs of the automotive industry: from design optimization (such as wrinkle-resistant treatment of body panels) to scalable production. Whether it's prototyping 3D-printed plastic parts or mass production of small batches of engine components, we can adjust processes to meet rapid cycle times and assembly requirements, thereby accelerating your time to market.

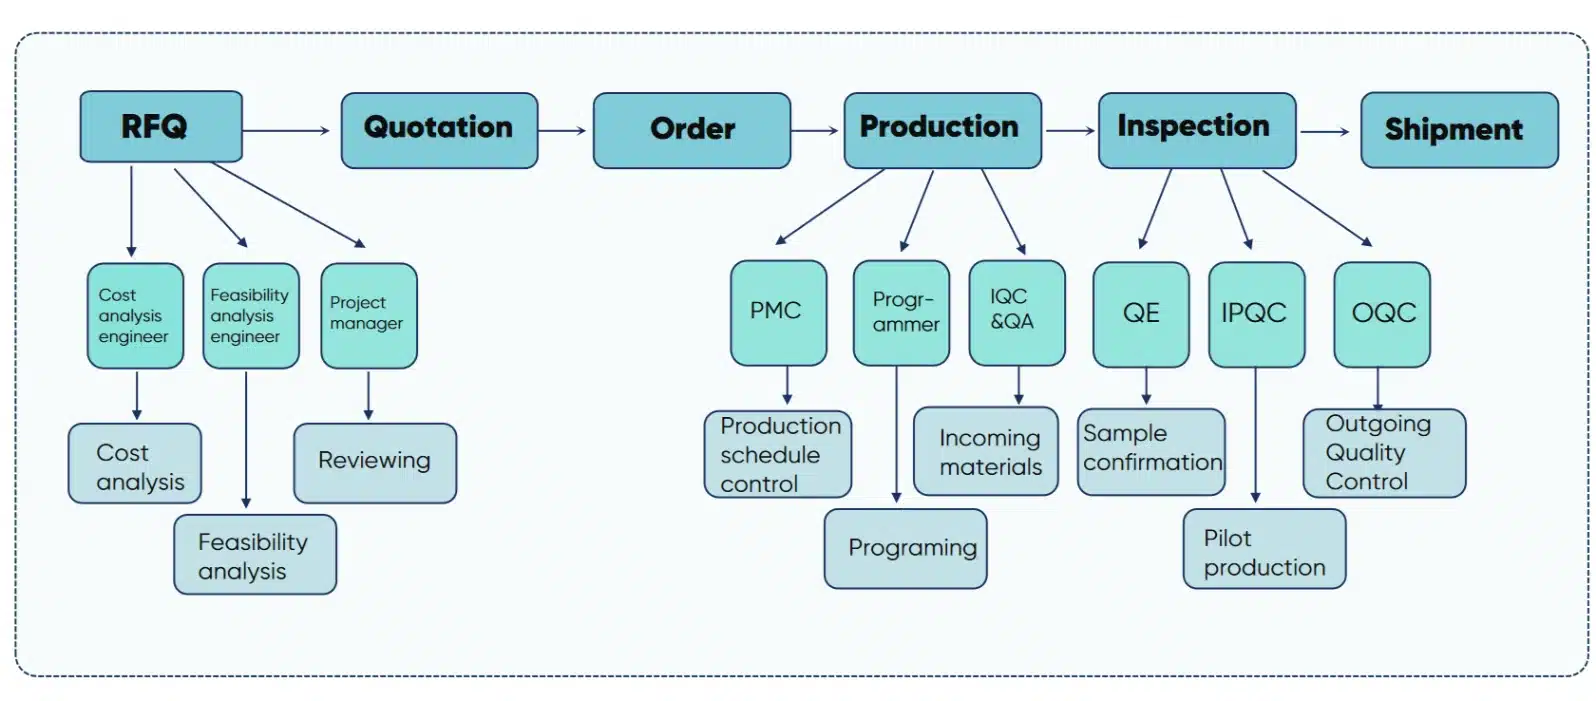
Our production processes comply with IATF 16949 standards, including raw material inspection (certified metals/plastics), in-process inspection (surface smoothness, angular accuracy), and traceable documentation. Each component meets OEM standards for safety-critical components.

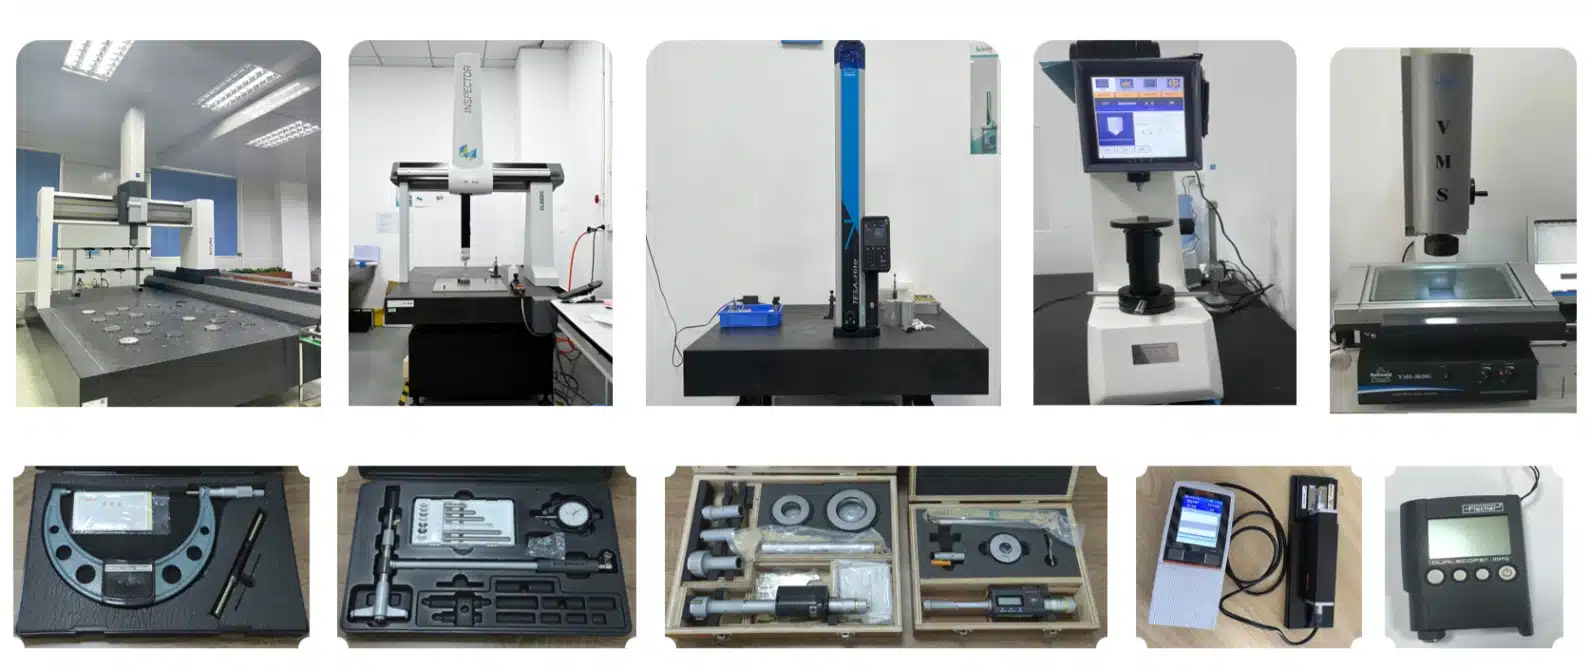
We are equipped with Zeiss coordinate measuring machines, Maer projectors, and Mitutoyo gauges to verify stringent tolerances (geometric tolerance ≤ 0.005 mm) and surface quality (Ra ≤ 0.8 μm). A 99.5% yield rate ensures reliable product performance in automotive systems.

Materials & Surface Treatments
Materials & Finishes for Optical Performance

Key Materials
Aluminum (2A12/7075):Lightweight, cost-effective for microscopes; stabilized via heat treatment.
Titanium Alloys (TC4):High strength for military optics; compatible with vacuum black plating.
Invar (4J36):Low thermal expansion for astronomical telescopes, ensuring dimensional stability.
304 Stainless Steel/POM:Corrosion-resistant options for industrial cameras.
Surface Treatments
Aluminum: Matte black anodizing (light-blocking, no streaks).
Titanium/Invar: Vacuum black nickel plating (wear-resistant, no peeling).

FAQs
Q: We need engine components (e.g., intake manifolds) and body panels with complex geometries and strict tolerances. Can Dakings handle these?
A: Yes. We leverage 5-axis CNC machining for engine parts (e.g., ±0.005mm tolerance on intake port angles) and 3-4 axis machining for body panels (ensuring wrinkle-free, seamless curves). For surface quality:Engine components achieve Ra ≤0.8μm (smoothness for optimal performance).Body panels undergo strict visual checks (no scratches, wrinkles). We also specialize in materials like 7075-T6 aluminum (engine parts, high strength) and 304 stainless steel (body panels, corrosion resistance), balancing precision and functionality.
A: Our workflow is optimized for automotive’s fast cycles:
Prototypes: Ready in 24 hours (e.g., 3D-printed plastic dashboards, CNC-machined aluminum brackets).
Small batches: Delivered in 5–7 days for most parts (e.g., stamped body panels, 5-axis machined engine components).
We reduce delays by:
Grouping similar materials (e.g., aluminum profiles for multiple parts).
Streamlining processes (e.g., parallel surface treatment and inspection).
Even for multi-variety orders, we prioritize speed without compromising quality.
A: We adhere to IATF 16949 for end-to-end quality and traceability:
Precision Inspection:
Zeiss CMMs verify dimensional tolerances (e.g., ±0.005mm for engine ports).
Projectors check flatness; Ra testing ensures surface smoothness.
Documentation:
Material certificates, first-article reports, and in-process logs are stored for audits.
Functional Validation:
Assembly trials confirm seamless fit; hardness tests (e.g., HRC 30–35 for 7075 aluminum) ensure material performance.
This rigor guarantees parts meet OEM safety and quality requirements.